K&F Concept 100 x 100mm Square Filter Kit ND1000 with Metal Holder and Adapter Rings
- George Nolan IV
- Jun 14, 2022
- 5 min read
Updated: Jul 1, 2022
I recently tested the Kent & Faith 100 x 100mm square filter kit. Square ND filters are something I had been looking to try out for a while. I thank Kent and Faith again for this continuing collaboration. If you are interested in getting the product for yourself after reading this:
Click HERE to go to K&F Concept's Amazon page
Get a 5% discount with the code: ESFILTERS05
Who are K&F Concept?
K&F Concept, a brand founded in 2012, has been committed to designing, innovating and manufacturing photography accessories.In the pursuit of product excellence, K&F Concept has obtained more than 150 patents and various international product awards. K&F Concept has been a popular buy in 56 countries and regions and is involved in different markets in the Americas, Europe and Asia.
Their official website is under upgrading, so you can browse www.kentfaith.com - the website of K&F Concept authorised shopping mall - for reference. Kent faith is a comprehensive shopping mall of all kinds of video and audio products, which is popular with users all over the world. All K&F Concept products are available at Kent Faith.
Packaging
The box containing the filter kit was well packaged and bubble wrapped. The filter kit box was shrink wrapped which was a bit difficult to get off without a sharp object but that could have just been my incompetence.
The kit comes as two separate boxes held together by a cardboard sleeve, one for metal holder and adapter rings (individually plastic wrapped), which come stacked on top of each other and another for the square filter which comes in a lovely leather (I think) sleeve.
What's in the box?
As mentioned before, this kit comes as two separate boxes. In one box, you will find the metal holder for the filter, protected by some foam and underneath it in a smart little box, you will find the adapter rings.
In the second box, you will find the 100 x 100mm ND1000 filter in a stylish sleeve.

What is a ND Filter?
In simple terms, a neutral density or ND filter is a filter that is placed in front of a lens to reduce the amount of light making its way to the camera. Think of the ND filter as sunglasses for your camera - although these "sunglasses" do not change the colour of the light being captured, hence the title of neutral.
The classic use of a ND filter is to reduce the shutter speed of your camera in order to create motion blur or emphasise motion in subjects such as waterfalls, clouds, water, smoke and vehicle traffic.
The ND filter also allows photographers to shoot in bright daylight conditions with wide angle apertures without the fear of overexposing.
The ND number relates to the amount of stops (the amount of light) that is being reduced to reach the sensor of the camera. This specific ND filter reduces 10 stops.
"A stop is a doubling or halving of the amount of light let in when taking a photo. For example, if you hear a photographer say he's going to increase his exposure by 1 stop, he simply means he's going to capture twice as much light as on the previous shot." - www.photographymad.com
Adapter Rings
While most companies make you pay for each adapter ring individually, the kind people at Kent and Faith give you 8 different sizes that cover all the typical lens sizes. The sizes included are: 49mm/52mm/ 58mm/ 62mm/67mm/ 72mm/ 77mm/ 82mm.
I found the adapter ring to be really sturdy. They screwed onto all my lens without an issue. I found that If you were going to work with a few different lens for a shoot, it's best to screw on the different adapter rings you require on each lens before you start shooting and simply clip on the metal filter holder between the lens. This will save you time overall.
Metal Holder
After you screw on your required ring adapter, as the ND filter is a whopping 100mm, you need to attach the metal holder which holds the filter in place. The first step is to place the holder onto the adapter ring, which fits very snugly, turn the orange screw on the side of the holder until it is firmly in place. You then have two slots that you can slide the 100x100mm ND filter into, again the fit is perfect, no looseness at all. The holder also has a black light absorbing sponge strip to prevent light leaking into the camera. The holder has two slots so you can accommodate two square filters at the same time if needed be.
100x100mm ND1000 Filter
Now we get to the star of the show, the ND filter which reduces light by 10 stops, so it is reducing the amount of light into your camera by a lot! You can hardly see through it. As with all Kent & Faith filters, they are made of Japanese AGC optical glass and have a 28 multi-layer Nano coating technology which means they are waterproof, scratch resistant and the anti-reflective green coating is effective against oil and fingerprint marks.
I have no complaints about the filter, it does exactly as it says.
Real World Tests
At first, I wasn't getting the results I wanted. I tried taking photos in the harsh bright daylight and I kept getting lens flares or I couldn't get the smooth effect on the water. For my second attempt, I tried to take some shots around five minutes before sunset and the ND filter made the composition too dark to shoot anything and pretty much all my shots were blurry.
I took a step back and researched what I was doing wrong and I got the answers I needed from YouTube. To use the ND filter properly I suggest you do the following:
Compose and Focus - Find the composition you want, let autofocus do its thing and then switch your camera to manual focus instead. This is because once you put on the filter, your camera's autofocus will start hunting around to focus and it will mess up your shot.
Get the Right Exposure - Whilst finding your composition find your baseline exposure (without the filter on). You will use that exposure to dial in what you will need with the filter on.
Put on the Filter - Now the easy part, put on the filter, trying to not to touch any part except the corners.
Calculate the Maths - Now that we have reduced the exposure by 10 stops, we need to increase the shutter speed by 10 stops.There are three ways to do this:
30 clicks of the exposure dial
Multiplying your baseline shutter speed by 1000 (e.g. if your shutter speed is 1/200, you divide 1 by 200 and multiply by 1000 equalling 10 seconds)
Simply using an app to work it out
BE AWARE: If you get a shutter speed of over 30 seconds, you should use a remote or app if your camera manufacturer has one as most cameras don't offer an in built control over 30 seconds.
Great apps to workout your shutter speed include:
LEE Filters - Stopper Exposure. Photo & Video.
MyGearVault. Photo & Video.
Perfect Exposure. Photo & Video.
The Photographer's Ephemeris. Photo & Video.
Digital DoF. Photo & Video.
NDExposure. Photo & Video.
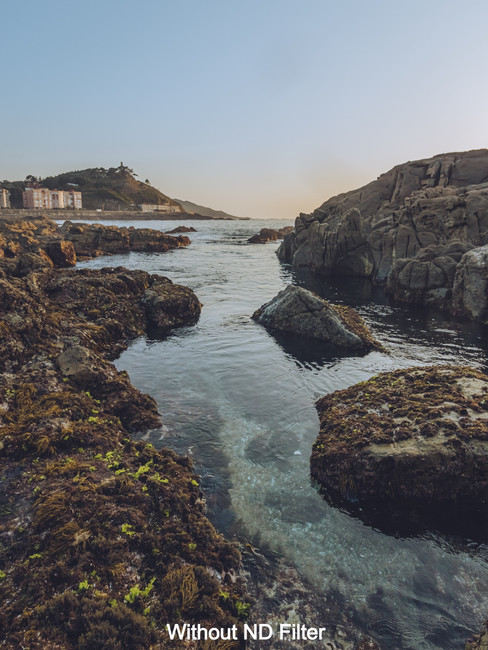
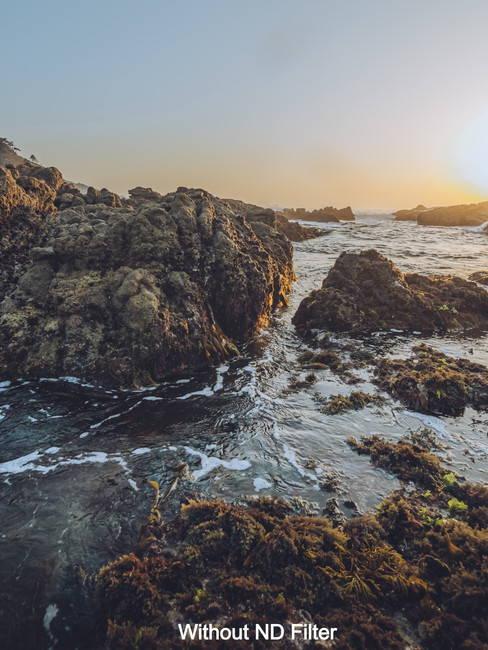
With all the above information in mind, I set out for my third attempt and I finally started getting some useable shots. See below:
Conclusion
Once I understood how to use the ND filter properly, the experience was a lot more pleasant and I was really happy with the results. If you have time to set up your tripod, composition, filter kit and then apply the maths to get that silky smooth water, then this system could be for you.
If you are point and shoot photographer who likes to move quickly between compositions, you may find this way of shooting very time consuming. If you're not sure which one is for you, I recommend that you give the filter system a try, you may surprise yourself with your preference.
The link again to buy the product if you are interested:
Click HERE to go to K&F Concept's Amazon page
Get a 5% discount with the code: ESFILTERS05


Comments